Week 15: Networking and Communications
Assignment:
- Design and build a wired &/or wireless network connecting at least two processors.
For this week assignment I decided to do a Serial Bus boards using C to program them.
Machines:
- Trotec Speedy 300
- Soldering heat gun
Software:
Components:
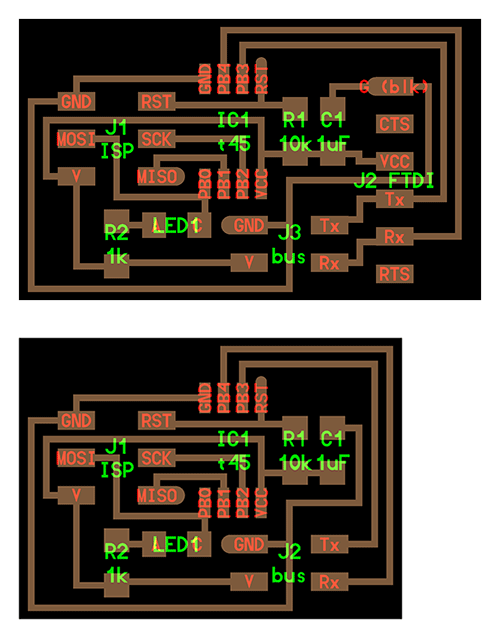
- Bridge Board:
- 6 pin FTDI connector
- 6 pin ISP connector
- 4 pin Bus connector
- 1 ATtiny 45
- 1 Resistor 1K
- 1 Resistor 10K
- 1 Capacitor 1uF
- 1 LED red
- Node Board:
- 6 pin ISP connector
- 4 pin Bus connector
- 1 ATtiny 45
- 1 Resistor 1K
- 1 Resistor 10K
- 1 Capacitor 1uF
- 1 LED green
The purpose is to network several boards together in the form of a serial bus. The bridge board is connected to a computer via a FTDI cable and the node boards are connected to the bridge board. I used three node boards for this exercise.
First of all I download Neil’s board diagrams and png.
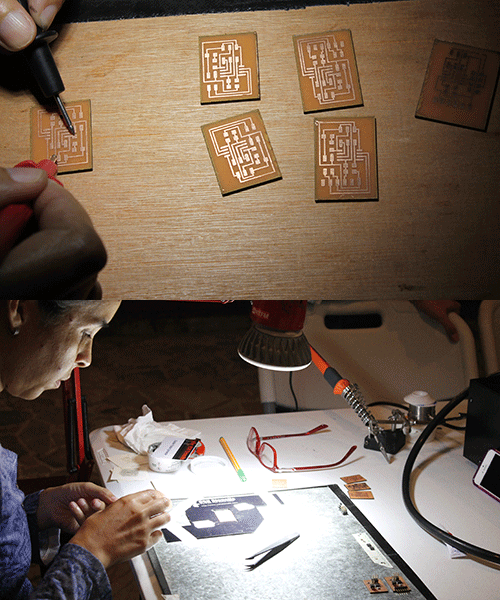
To fabricate and construct the boards, I did the same as my previous electronics assignments, I used a vinyl stencil cut in Laser Trotec Speedy 300 to paint the traces and etch in ferric per chloride.
After classified the components, I solder them using soldering paste and a heat gun.
These are my boards finished:

Once I finish the soldering process I test the board to be sure everything works well and I proceed to connect each board with the FabISP, and then I connect the mini USB cable to my computer to start to programming them.
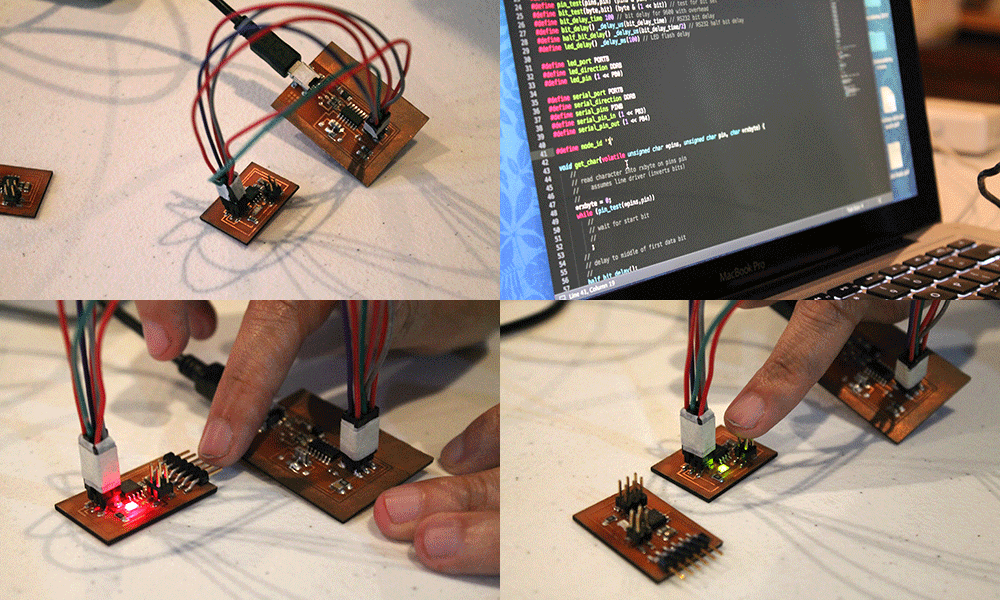
When everything was connected I follow the next steps to compile C and program the board:
- Download Nei’s .c and .make files.
- Open the C file in Sublime Text to modify the code in the line #define node_id '0' --> each node needs to have a different number 0, 1, 2, 3 - for each additional node you add. In this exercise there is a bridge and 3 additional boards, so the bridge should be number 0 and the nodes 1, 2 and 3.
- Open Terminal located in Applications folder and change directory to the folder where saved the .c and .make files. Save the C file after changing the node number.
- In Terminal command “make -f hello.bus.45.make program-usbtiny” to upload the C program to the board.
- Follow steps 3 and 4 to program each node connecting them to the FabISP.
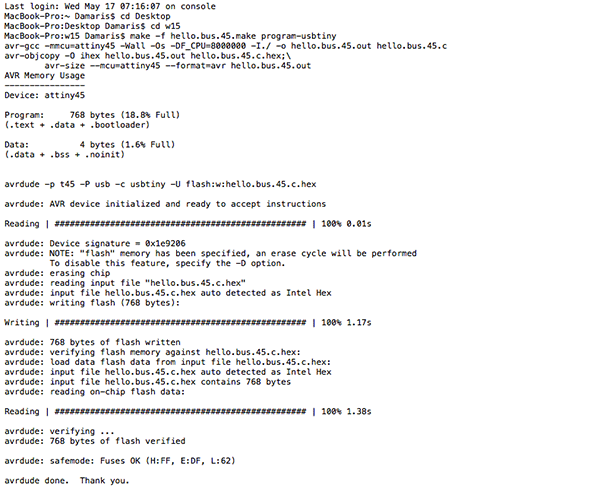
Every time the compile process finishes, the LED in the board should blink.
o see the serial bus working, follow the next steps:
- Open a Arduino IDE
- Open the serial monitor
- Enter number of note into serial monitor - press "enter”. The node with the number typed should echo in on the serial monitor and the LED on the board should flash twice.

And here is a video showing how it works.
Asynchronous Serial Bus from Damaris Cotto on Vimeo.